
Getting Started With Apache Airflow
Getting Started with Apache Airflow in Linux
Apache Airflow is an open-source workflow management platform for data engineering pipelines. Airflow uses directed acyclic graphs (DAGs) to manage workflow orchestration. Tasks and dependencies are defined in Python and then Airflow manages the scheduling and execution. DAGs can be run either on a defined schedule (e.g. hourly or daily) or based on external event triggers.
Installation
You can install it after you install the python pip and virtual env tool to create virtual environment in which we can install airflow.
First you need to check if any updates are available for your system by using:
sudo apt update
If any updates are available you need to upgrade it by entering:
sudo apt upgrade
By default there exists python pip in latest linux distributions for python. However, if you want to install python pip then you can use following command in terminal:
sudo apt-get install python3-pip
Then you need to create a virtual environment in which we can install airflow.
To install virtual environment tool, enter following commands in terminal;
sudo apt install python3-virtualenv
Then create a virtual environment named airflow_venv in your home directory using:
virtualenv airflow_venv
Activate the newly created environment and then apache-airflow using following commands:
source ~/airflow_venv/bin/activate
pip install apache-airflow
Check the version of the installed airflow using:
airflow info
This creates a new folder named airflow in home directory. That has following files and folders: airflow.cfg, logs,webserver_config.py
To start using airflow, you should first intialize the database using command:
airflow db init
First create a airflow user using following command in terminal:
airflow users create -e <email> -f <first_name> -l <last_name> -u <user> -p <password> -r <role>
Take for an example:
airflow users create -e visaalpathak@abc.com -f visaal -l pathak -u visaal -p airflow_p -r Admin
Above command creates user called visaal.
After creating an airflow user, start the airflow server using:airflow webserver in one terminal and airflow scheduler in another after activating the airflow environment.
After staring scheduler, you can go to the local host http://0.0.0.0:8080 as shown in the terminal where u hit command airflow webserver. You will be directed to following login page:
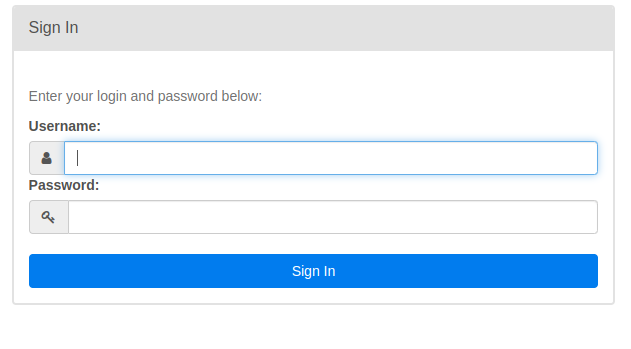
After entering the username and password of the newly created user in airflow in terminal. You will finally be able to enter the homepage of the airflow UI.
It will be something like this:
Notes
- You will probably get a warning about executor i.e. about not using the sequential executor in the production environment in the UI page, that is not shown in the above screenshot. If you want to execute tasks sequentially, then it’s not really that important. However, if you are really annoyed by that warning or maybe you want some tasks to run parallely you will need to change the executor to either “Local Executor” or “Celery Executor”. Local executor maximizes the use of your local system where as, celery executor utilizes the resources of the workers systems. More on this here.
- AIrflow uses SQLite as its database by default, Hence, in Sequential Executor mode(i.e. default mode), SQLite is used as database facility. However, to be able to execute tasks parallely, you not only need to change the executor to “Local Executor”, You also need to change the database to either mysql or postgres in the airflow.cfg file.
- To change the default database from SQLite to MYSQL, first create a database “airflow_db” that should be utilized by airflow in MySQL. Create a new mysql user and grant all the privileges of the airflow_db to this newly created user. You can do this by entering following commands in mysql:
-- To create a new database
create database airflow_db;

-- To create a new user and grant it all privileges
create user "airflow_user"@"%" identified by "strong-password";

-- granting privileges to newlly created user
GRANT ALL PRIVILEGES ON airflow_db.* TO 'airflow_user';
FLUSH PRIVILEGES;
Now, go to the airflow.cfg file and comment or replace the sqlite config to mysql config as:
sql_alchemy_conn = 'sqlite:////Users/KLoGic/airflow/airflow.db'
to
sql_alchemy_conn = mysql://airflow_user:[password]@localhost:3306/airflow_db
Every time you change the .cfg file, you should set the habit of restarting the airflow webserver and scheduler.
Then initialize the database using airflow db init. Then run webserver and scheduler again, then you will get rid of sequential executor warning and be able to run tasks parallely.
You are now good to go.
- Note: If you have ‘@’ in your password then you will have to insert “%%40” in place of @, because system will confuse it for @ before the hostname.
Creating our first DAG
We have now set up our database and ready for writing our first dag. What is dag?
It referes to Directed Acyclic Graph. It is simply a graph of tasks according to their dependencies among each other.
Let’s write our first dag in airflow. Below is an example of a simple dag that creates a database and creates a table inside the database after which we will create a table and then insert some data to the table. Let’s start with basic imports for writing our DAG.
from airflow.models import DAG
from airflow.providers.mysql.operators.mysql import MySqlOperator
Note that, for using Mysql operator, you have to first install it using:
pip install apache-airflow-providers-mysql
After successfully installing mysql operators, you will have to make a mysql connection id that will be used in tasks of dag. You can do this using UI or command line as well. As command line makes this faster, let’s make a mysql connection id using following command:
airflow connections add [connection_name] --conn-type [connection_type] --conn-login [username] --con-password [password] --conn-host [host_name] --conn-port [port]
In my case:
airflow connections add 'mysq_default' --conn-type 'mysql' --conn-login 'root' --conn-password 'Password' --conn-host 'localhost' --conn-port '3306'
Now let’s create our dag:
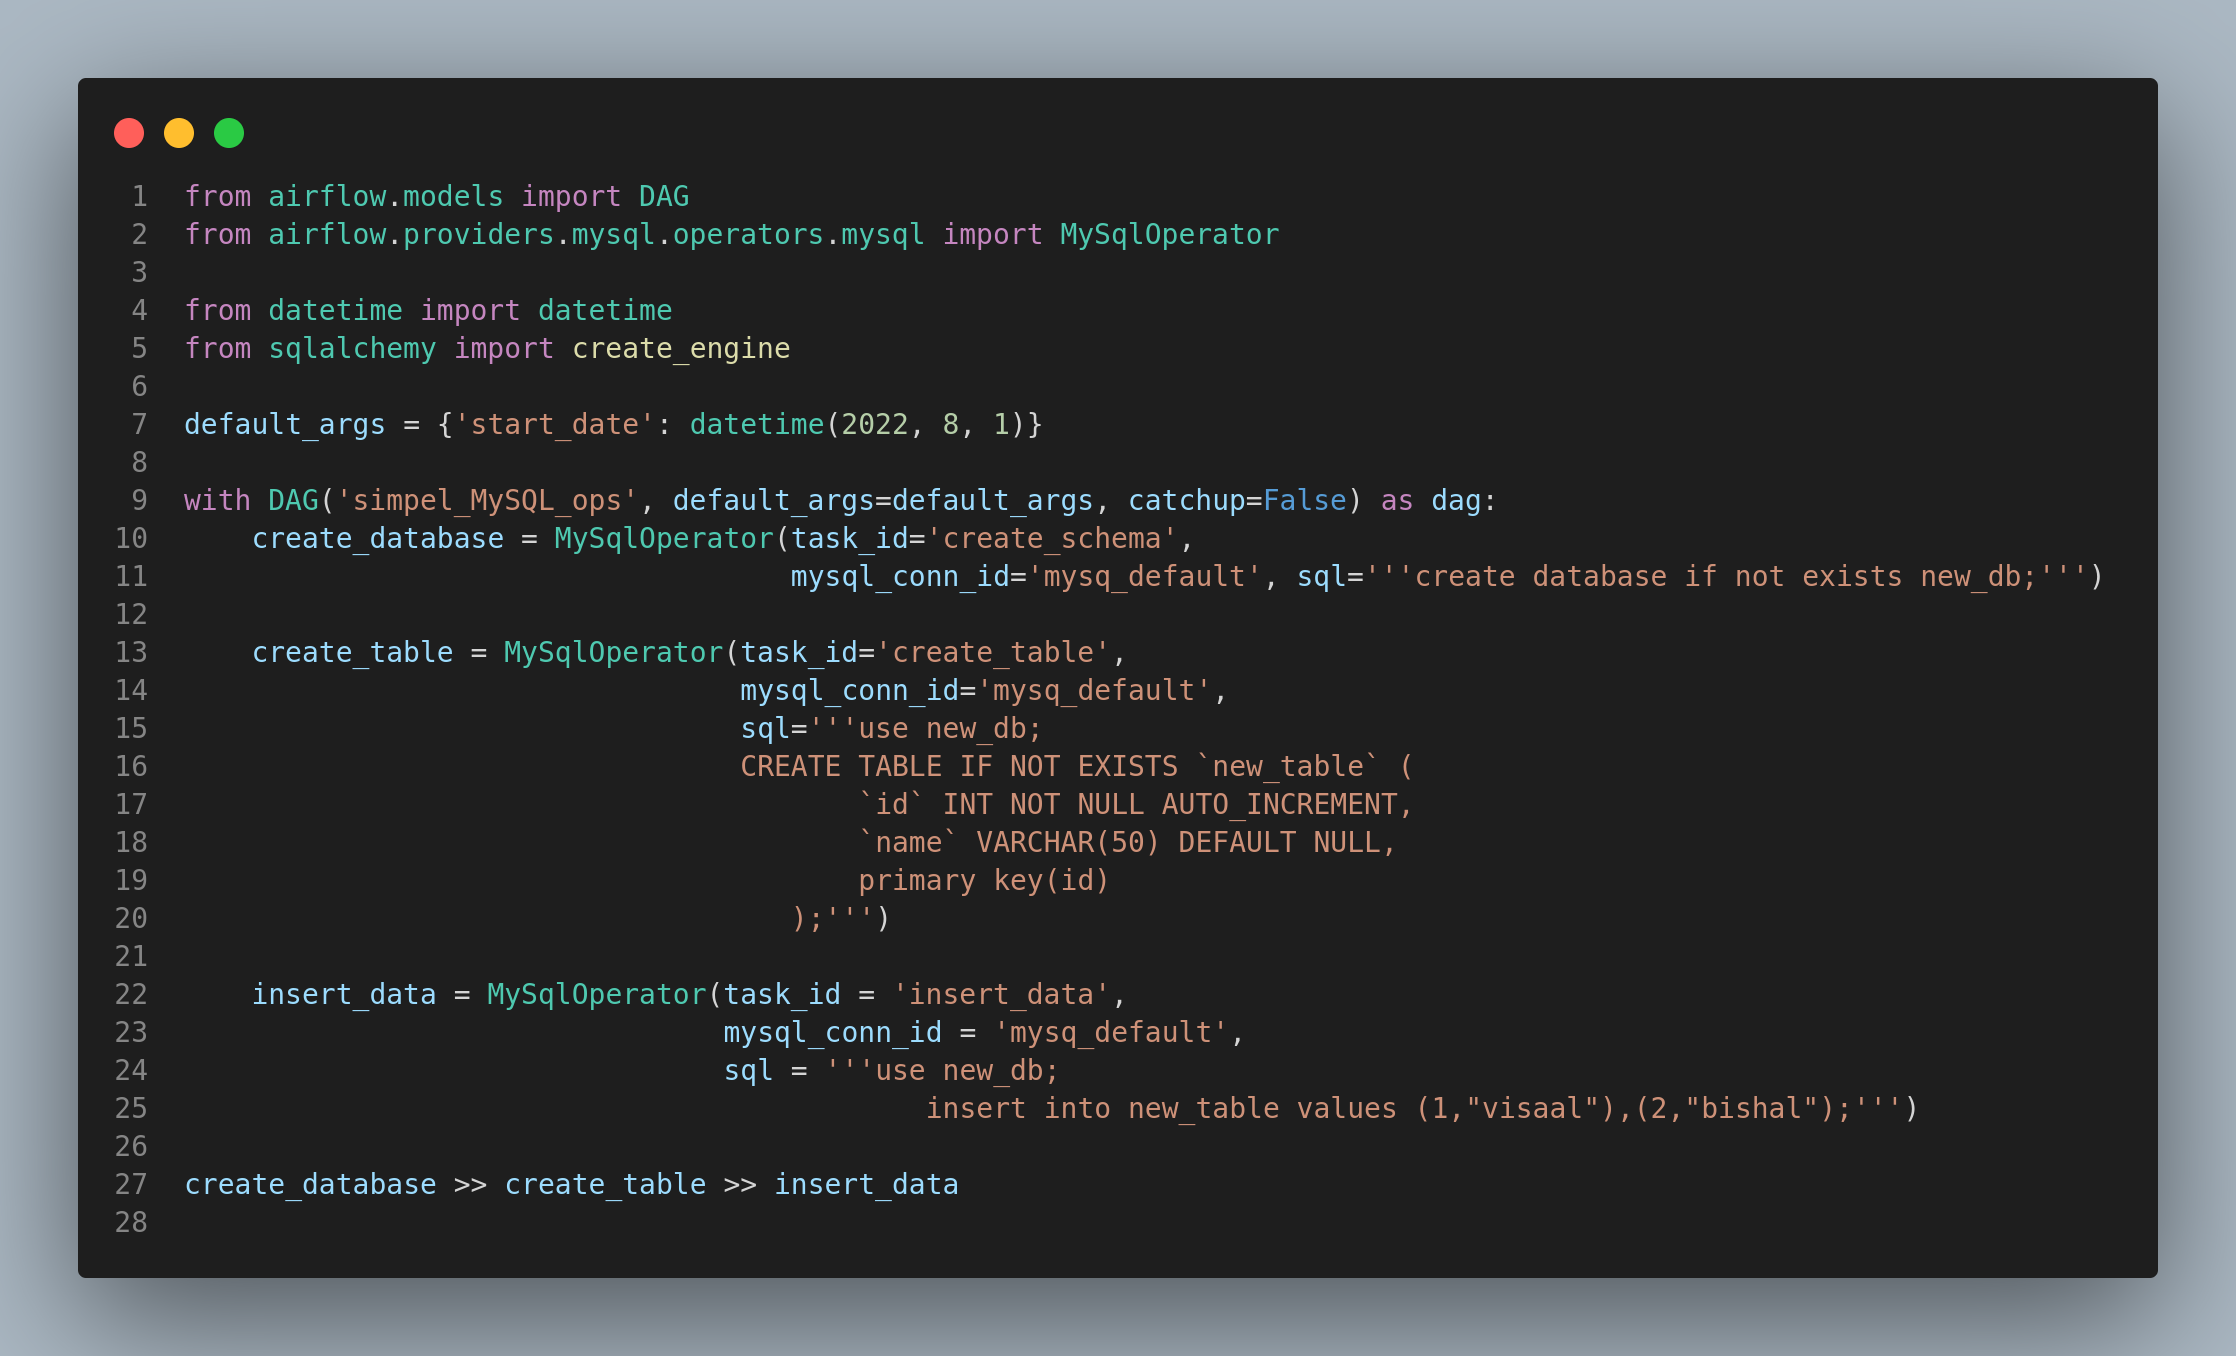
Above code is here.
We have written a dag, now let’s see it in action. After activating aiflow environment, hit airflow webserver and on another window hit airlfow scheduler
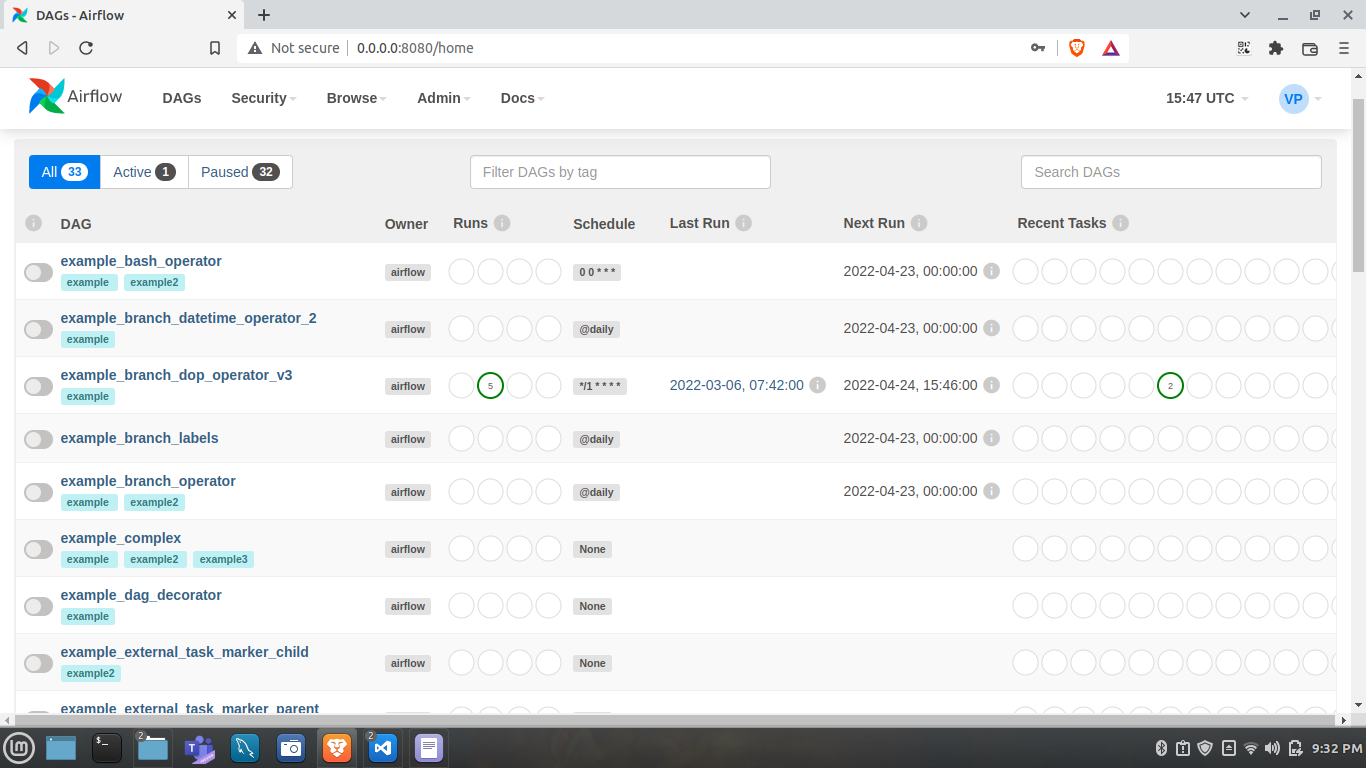
Go to: http://0.0.0.0:8080/home
You will now be redirected to airflow home page which will be something like this:
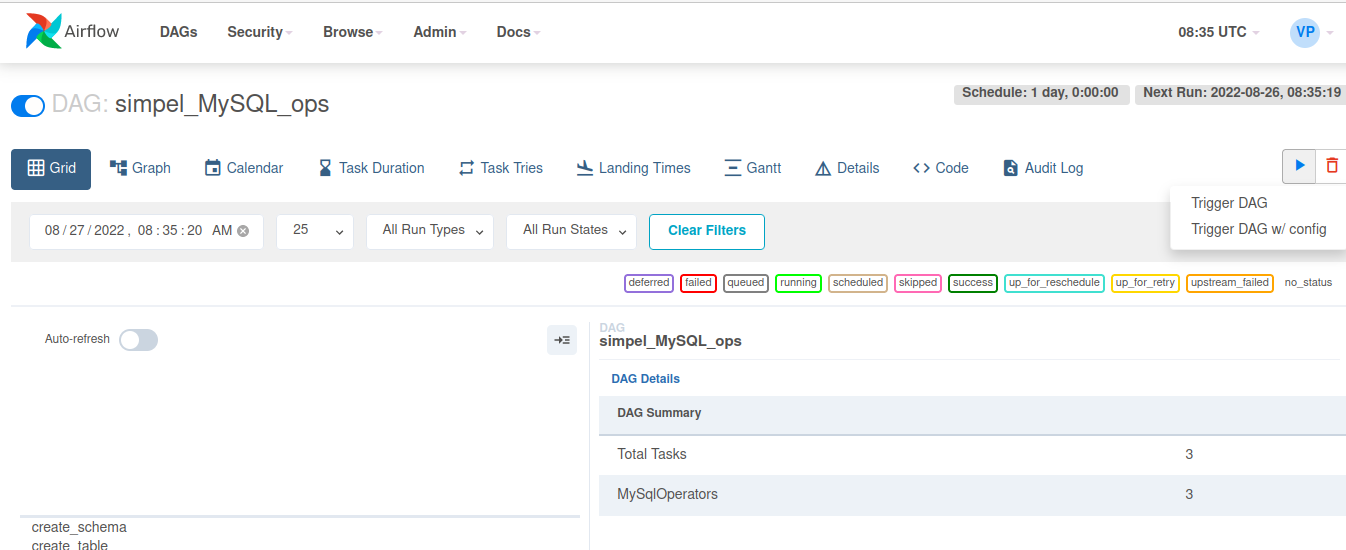
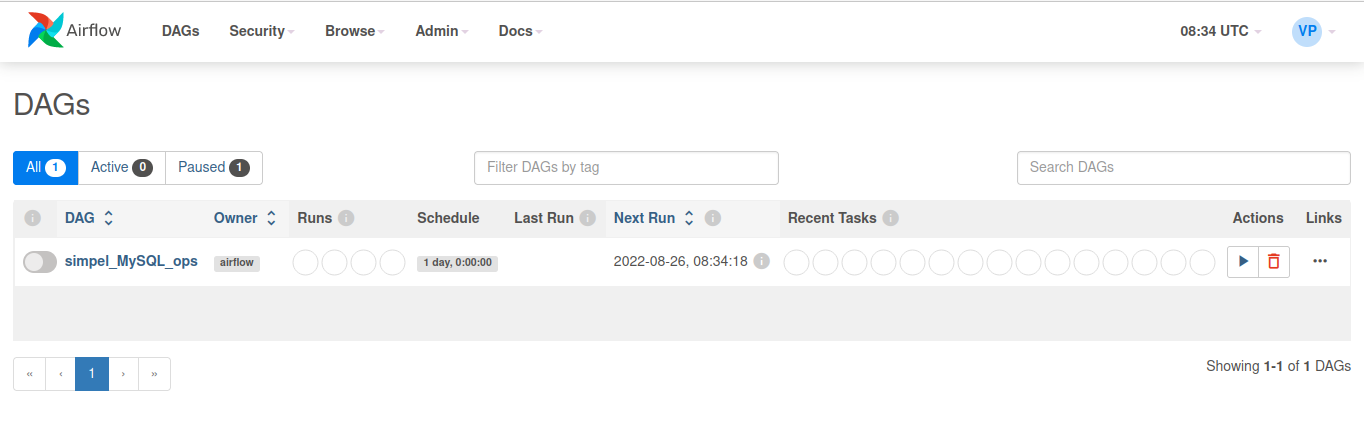 Click on the dag name then trigger the dag:
 After triggering the dag, let’s see it in graph view.
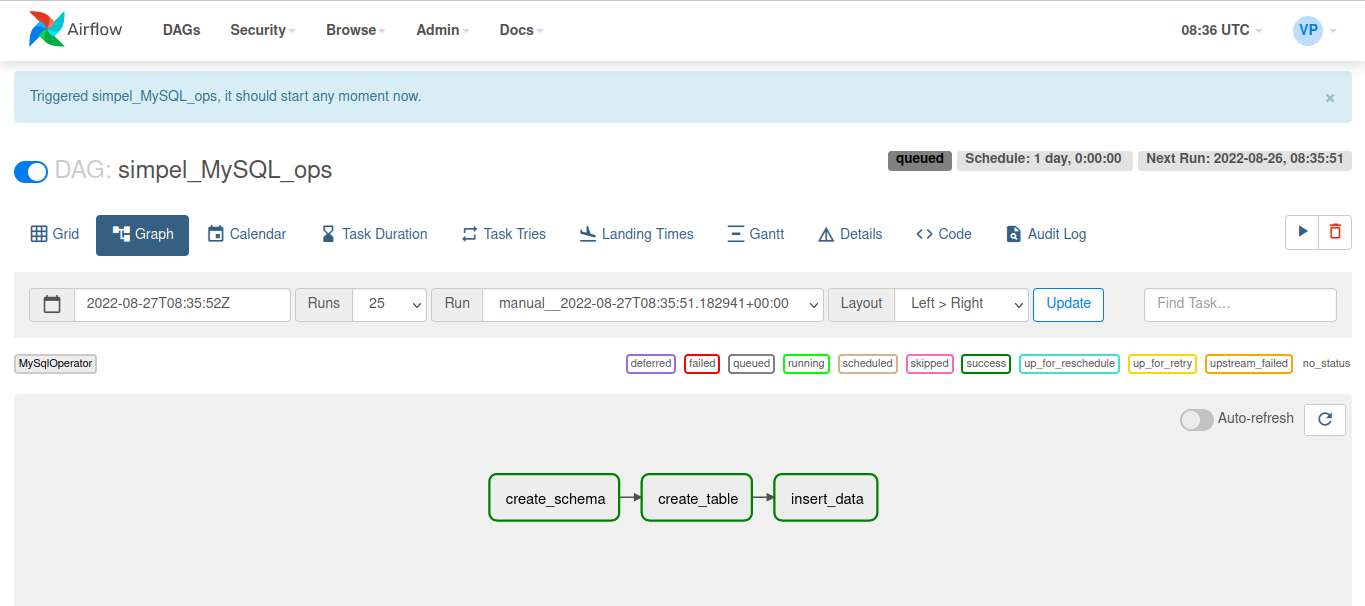 We can see that all the tasks are successfully completed as they are outlined green in above image.
We can further verify this from database side.
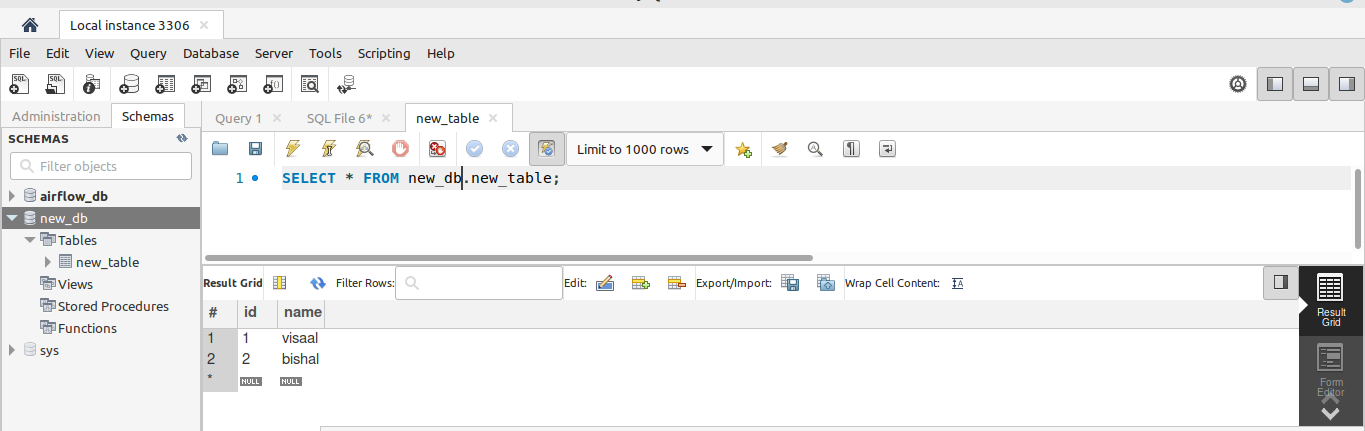 We can see that, what we tried to do has now been successfully completed.
We just wrote a dag that creates a database, creates table and then inserts data to the table.
We can see that, what we tried to do has now been successfully completed.
We just wrote a dag that creates a database, creates table and then inserts data to the table.
This is all for an introductory blog. I will keep on writing about airflow and what more can we do with it in upcoming blogs.
References:
- https://en.wikipedia.org/wiki/Apache_Airflow
- https://airflow.apache.org/docs/apache-airflow/stable/
- Udemy course by Marc Lamberti: https://www.udemy.com/course/the-complete-hands-on-course-to-master-apache-airflow/
Comments